
Raspberry Pi Music Video Player
Intro
Remember when music television channels actually played music videos? OK, there are still plenty out there, although you usually need a Free-To-Air satellite system, or a paid-for satellite or cable subscription ... and you still have to put up with idents and adverts. What if you have a collection of music videos? How can you play those? I can play mine via my Vu+ Duo2 Free-to-Air satellite system, although you can only play one video at a time, and some of them seem to cause a popping on the audio. I can also play the videos via my Oppo Blu Ray player, although that will play all of the videos in one folder, then stop. How can you play your videos in a random order to enjoy on your TV?
An idea started at work: how to randomly play the mp4 videos via the projector and speakers in the conference room to provide some entertainment during the end-of-the-month company-sponsored lunches. I would plug my Linux laptop into the projector and USB audio system, then run a simple BASH script that scans the Video folder, outputs that list as an m3u play-list, then calls VLC to play the list full-screen in random order.
Could I do the same thing at home? Yes, however it is a pain to keep connecting the laptop to the Hi-Fi amplifier. I realised I could do the same thing with a Raspberry Pi. I created a test-bed on a Pi Zero W board sitting in the bottom of my MMDVM hotspot. It struggled and required some extraneous functions to be removed before it would play the videos. I figured the project would work well on a full-phat board.
Set-out below is a guide to creating your own music video player using a Raspberry Pi 3 or 4. Once you have it all set-up, all you need to do is plug it into your TV/Hi-Fi system, power it up, and enjoy your own videos played at random until you press the stop button.
Hardware
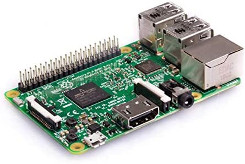
I built this project on a Raspberry Pi 3 B, as at the time of writing, there was a major shortage of up-to-date boards. The RPi 3 B board only supports 1920 x 1080 video and 2.45 GHz Wi-Fi. Newer models support 4k video and dual-band Wi-Fi.
You will also need a suitable case, a 5.1 volt power-supply, and a suitably sized micro SD card. I purchased a 128 GB class 10 micro SD card.
A Raspberry Pi starter kit is ideal for this project. It usually contains a Raspberry Pi, a plastic case, a power-supply and a 16 GB micro SD card (which I did not use).
I also recommend purchasing a heat-sink kit. These usually include heat-sinks for the CPU and the USB/Ethernet controller, plus a flat piece of copper that is attached to the RAM chip underneath.
I also recommend purchasing a small push-to-make button, a 2-pin 2.54 mm PCB header (the pins double as solder tags), and you will need some 7/0.2 wire and some heat-shrink. The push-button featured below required a 7 mm hole drilling in the plastic case. I measured 18mm from the right edge of the snap-in area. This was to avoid clashing with anything on the board, and ended up being right in the middle of the lid. Nice!
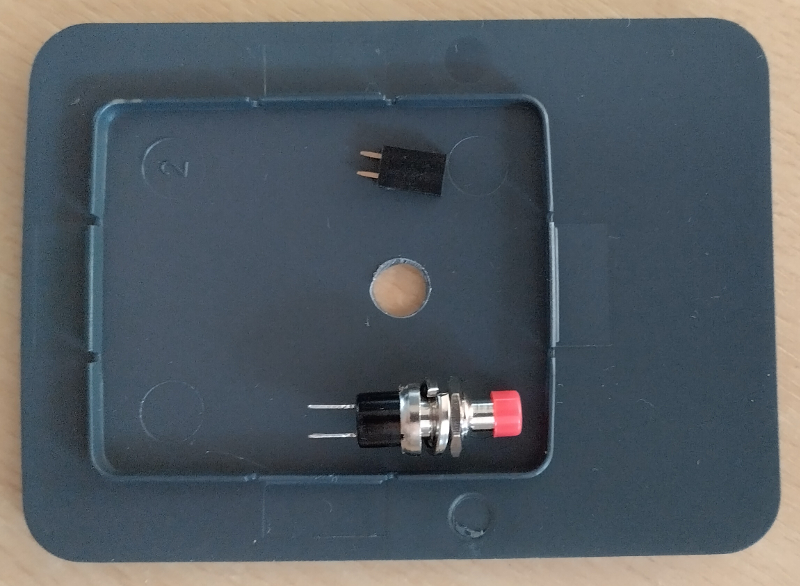
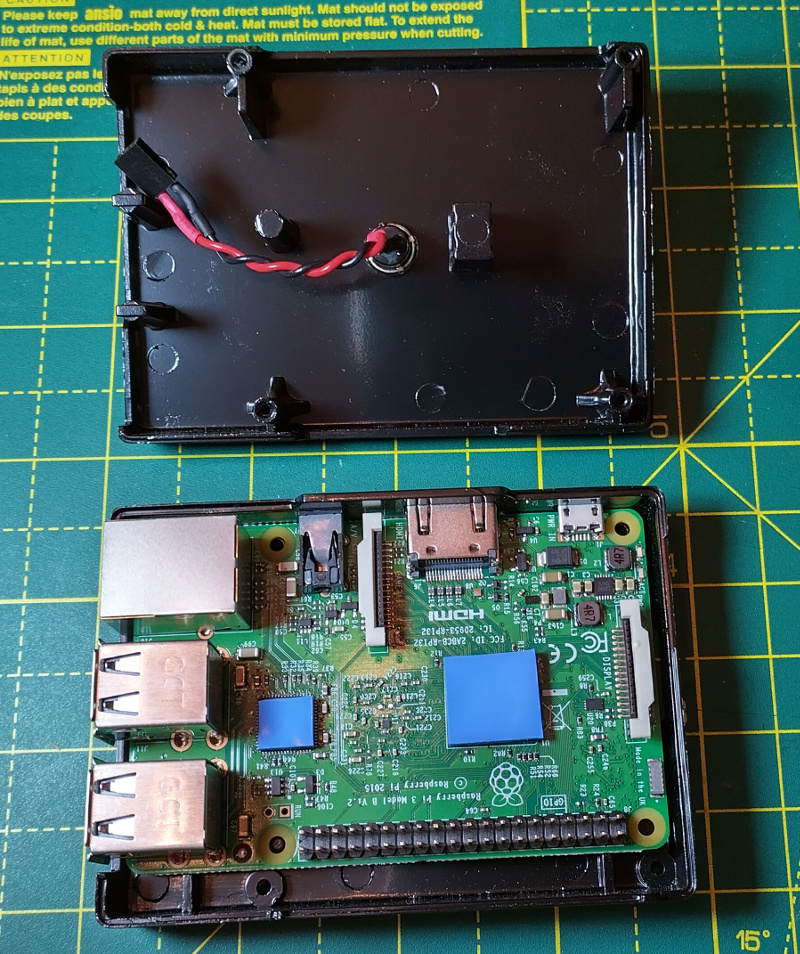
The aim is to make the switch up as in the image below. The plastic case is shown for an idea of dimensions.
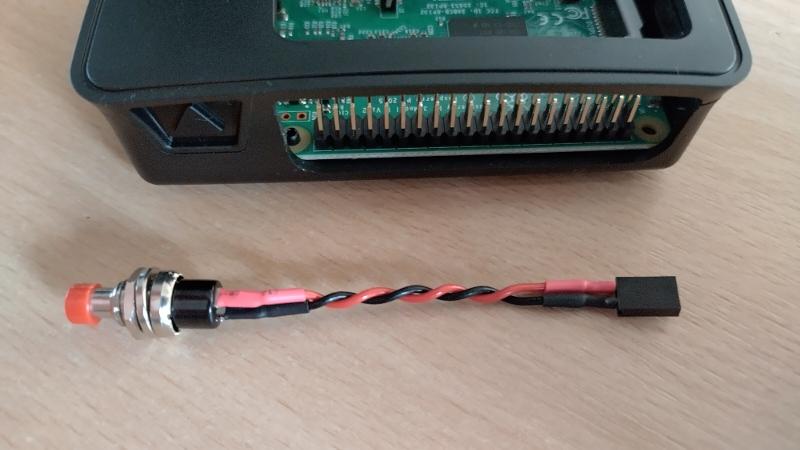
The button is connected across pins 26 and 27 of the GPIO pin-headers. How and why is detailed in the set-up.
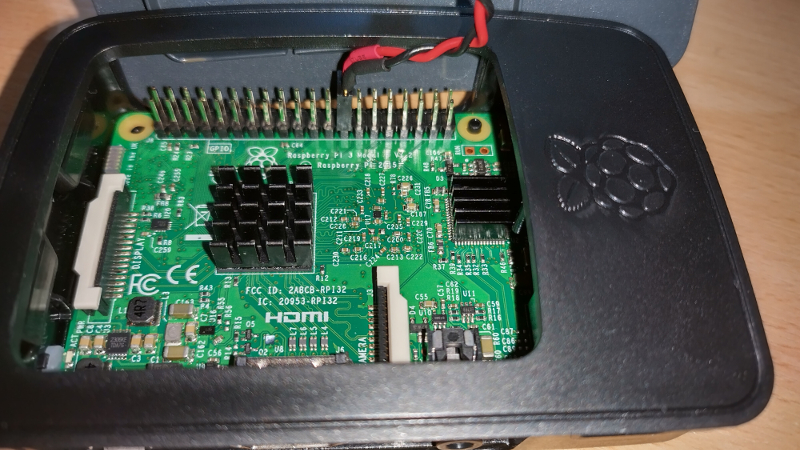
A side-view (prior to installing the heat-sinks). I marked pin 26 with a marker pen to make it easier to re-fit should I need to take the box apart.

Update 26th December 2022 - even with the heat-sinks, the board ran hot in the plastic case and experienced playback issues; so I purchased an all-Aluminium case from an ebay seller (from China).
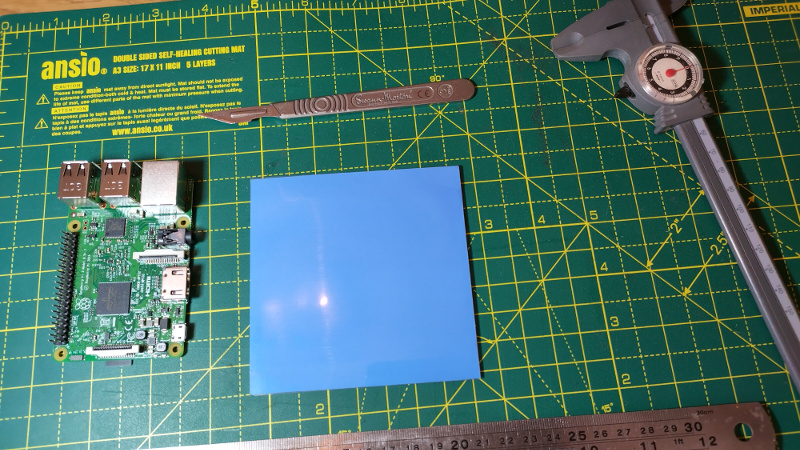
I also needed a piece of the thermal conductive silicone pad. The smallest I could purchase was 100mm x 100mm; and I hedged my bet on 2mm thickness as I was unsure of the gap between the CPU and the case.
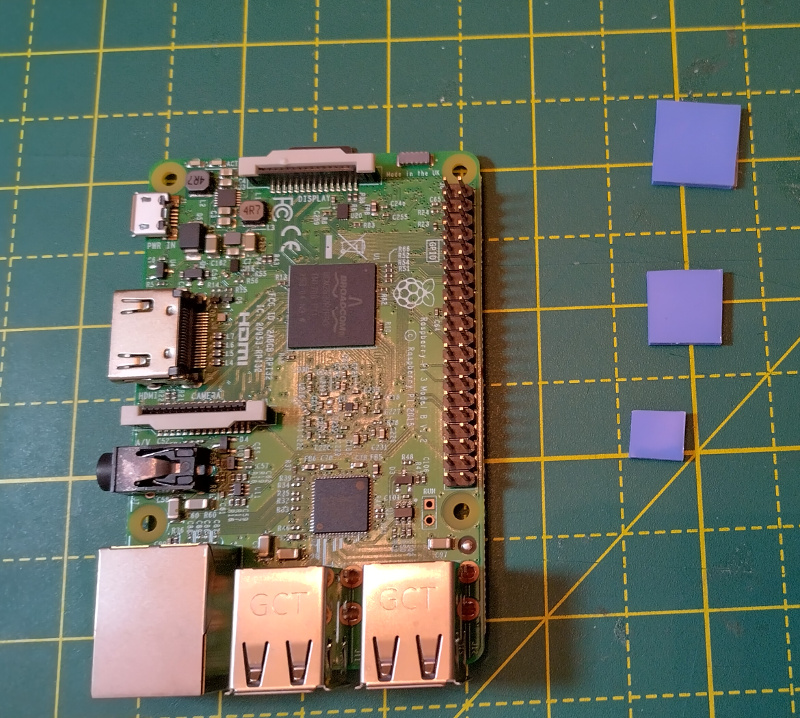
I cut three small squares: one for the CPU, one for the USB chip, and one for the RAM chip underneath.
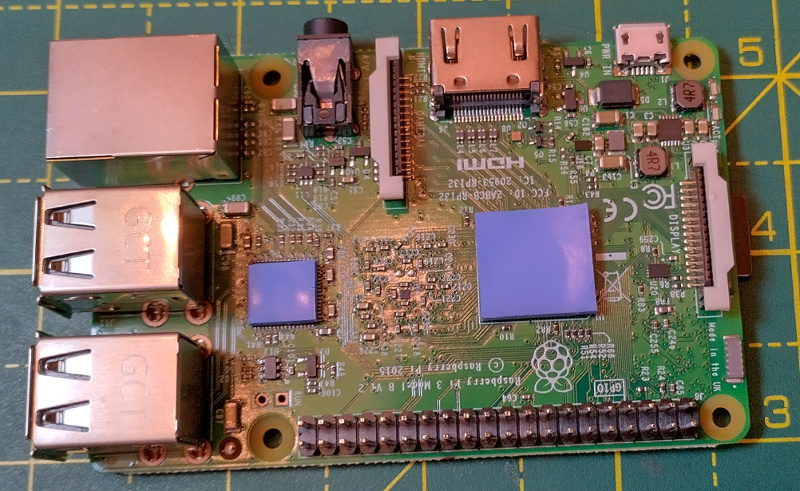
You have to remove the plastic backing from both sides, then you can place it on the chips.
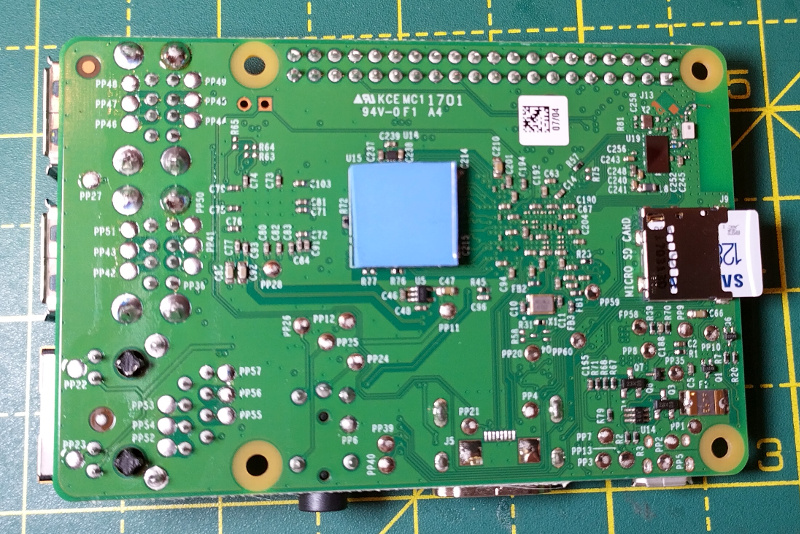
RAM chip underneath. You have to remove the micro-SD card before you assemble the case.
Seated in the case. The 2mm thickness would prove to be a little thicker than required. The board needed some careful manipulation to ensure it engaged with the pins. The top case was also a little tricky to fit with 2mm thick silicone padding. I had to remove some of the padding from the CPU and squash it down to suit. Ascertaining the correct thickness of pad could prove tricky due to the manufacturing tolerances and differences in design of these types of cases.
Top view of the finished case with the shut-down button.

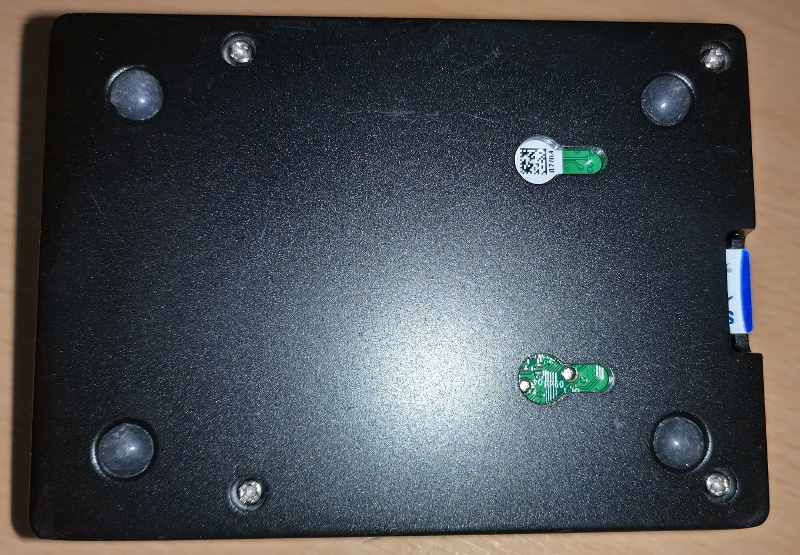
Underside view with the supplied stick-on feet applied and the micro-SD card fitted.
Along with the --vout mmal_xsplitter option for VLC (detailed below), the video stuttering issue I experienced due to the board overheating has been alleviated. After several hours of playing back videos of a variety of resolutions, the case feels slightly warm to the touch - which means it is doing its job!
Raspberry Pi OS
There are numerous guides available on how to create a suitable image on a micro SD card. As I am already using a Linux desktop, I am going to document the set-up from a Linux point-of-view. Some of the steps outlined below can be achieved with the image builders.
01 Download the 64-bit Raspberry Pi OS with desktop to suit the Raspberry Pi 3 B (or above) from here:
 https://www.raspberrypi.com/software/operating-systems/
02 Save the file to a suitable directory; e.g. ~/Downloads/Raspberry
03 Open a terminal window and: cd Downloads/Raspberry
04 Decompress the file with unxz ( xz-5.2.4-4.el8_6 on Rocky Linux 8): unxz 2022-09-22-raspios-bullseye-arm64.img.xz
Please note: the name of the file used above was current at the time of writing and will change as new versions are released.
05 You should see an image file; e.g. 2022-09-22-raspios-bullseye-arm64.img
06 Insert your micro SD card and note its device reference; e.g. /dev/sdb or /dev/sdc (You can check this with gparted or "parted /dev/sdc")
07 Write the image to the micro SD card with dd: sudo dd if=2022-09-22-raspios-bullseye-arm64.img of=/dev/sdc bs=4M
Be careful to check your destination as dd will blow-away working partitions!
When the copy process has finished, you should see something like this:
4068+0 records in
4068+0 records out
4265607168 bytes (4.3 GB) copied, 225.705 s, 18.9 MB/s
08 Mount the 'boot' partition by selecting it in the desktop's device list (as in the example below on the MATE desktop), or simply unplug and re-plug the micro SD card.
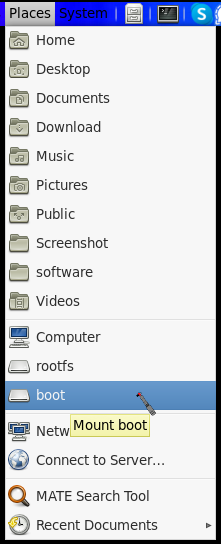
The micro SD card's /boot partition may be found under /run/media/$user/boot (where $user is your user name) on CentOS. Other Linux distributions may offer an alternative path to the mount point.
09 Open a terminal window and change directory to /run/media/$user/boot
10 Enter the command touch ssh to enable SSHd on boot. The touch command creates a zero byte file.
11 If you want to use your RPI on Wi-Fi create a file called wpa_supplicant.conf in the boot partition and include the following:
country=GB
ctrl_interface=DIR=/var/run/wpa_supplicant GROUP=netdev
update_config=1
network={
ssid="NETWORK-NAME"
psk="NETWORK-PASSWORD"
}
Where NETWOR-NAME is the SSID of your Wi-Fi and NETWORK-PASSWORD is the pass-phrase. You can add multiple Wi-Fi access points to this list by copying the network={ } section.
12 Create a file in /boot called userconf.txt and add the following details:
pi:encrypted_password
where encrypted_password is created from: echo 'mypassword' | openssl passwd -6 -stdin
(Requires OpenSSL 1.1 and above. OpenSSL 1.0 in CentOS 7 does not support the -6 option.
This process sets the password for the pi user so you can ssh to the running OS.
13 Edit /boot/config.txt with nano/pluma/gedit and add at the end of the file:
# Enable shutdown button
#
dtoverlay=gpio-shutdown,gpio_pin=7
The above sets GPIO header pin 26 to issue a shutdown of the running OS if shorted to ground (pin 27). And that is what the stop button is for!
14 Eject the micro SD card and insert it into your Raspberry Pi.
It is time to power it up! This part can be run from any computer which can open a Secure Shell connection; i.e. Linux, OSX,
or Microsoft Windows running
Mobaxterm.
Warning: if you like to run Jumbo frames with 9000 byte packets on your network - you will need a device that is set to use 1500 byte packets if you want to communicate with your RPi over the network.
At this point, you should be able to discover your RPI on your network and SSH to it.
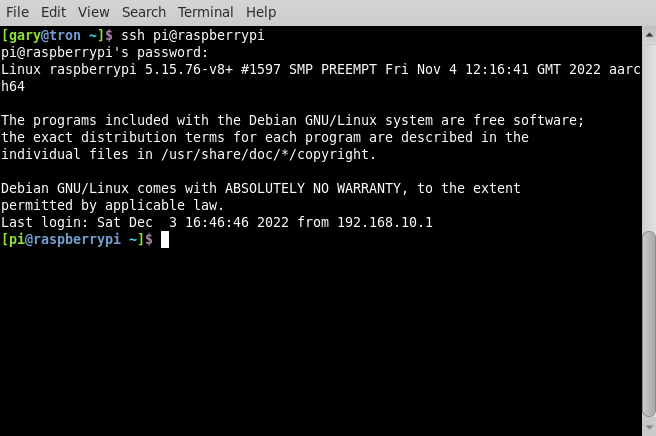
15 ssh to the device from a terminal window with: ssh pi@raspberrypi
(or what ever name has come up on your network. Scan with nmap if you cannot find it and use the IP address)
You should see something like this:
16 You can now go ahead and update the Raspbian packages with the following commands:
sudo apt update -y
sudo apt upgrade -y
sudo apt dist-upgrade -y
The update process will take a few minutes to run.
17 And remove any obsolete packages with: sudo apt autoremove -y
Optional: run rpi-update to update all of the firmware on the board with the command: sudo rpi-update and reboot after with: sudo reboot
Login again with SSH when your RPI has rebooted.
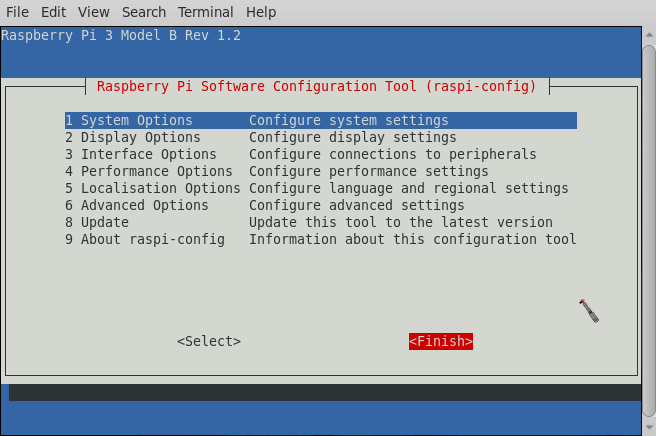
18 Run raspi-config to change some important settings: sudo raspi-config
You can move the selection along with the Tab key.
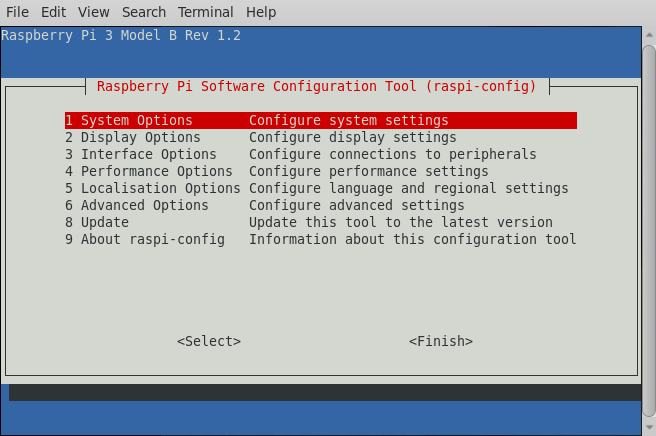
19 Select 1 - System Options, followed by S2 - Audio.
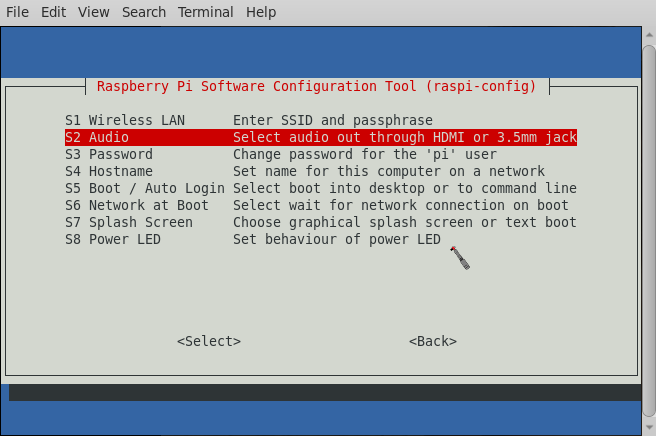
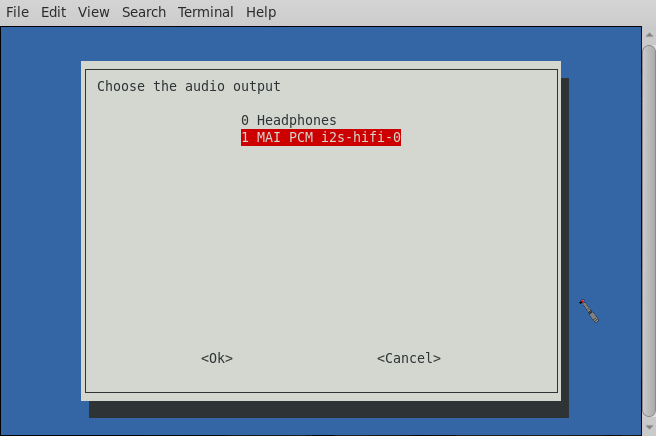
20 Set the default to HDMI (you will need the RPi connected to an HDMI device to set this).
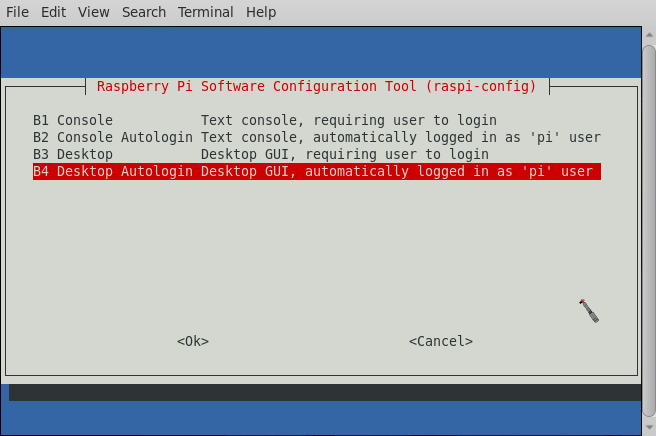
21 Select S5 - Boot / Autologin
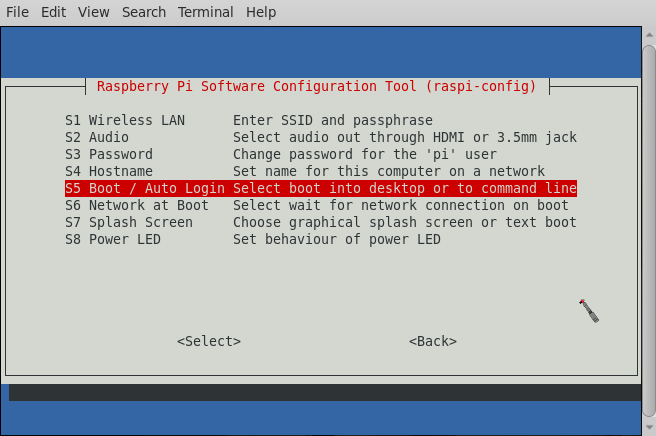
22 Select B4 - Desktop GUI, automatically logged in as 'pi' user (even if it has already done that).
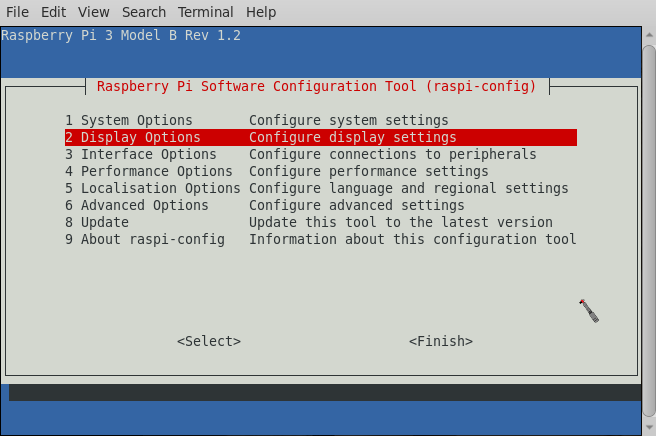
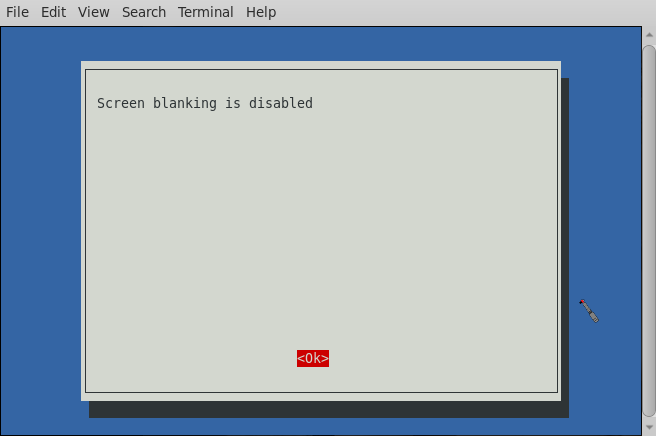
23 Select 2 - Display Options
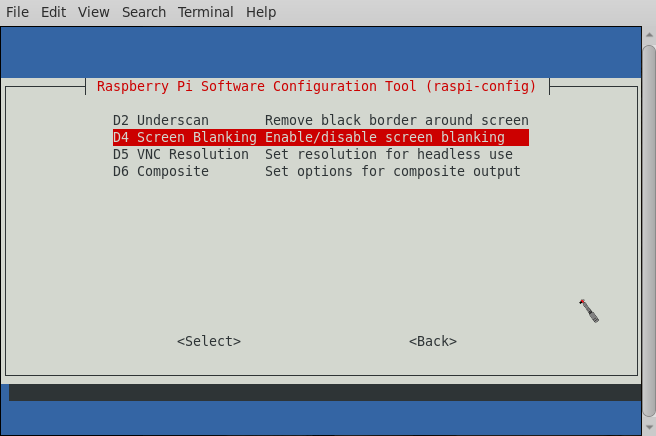
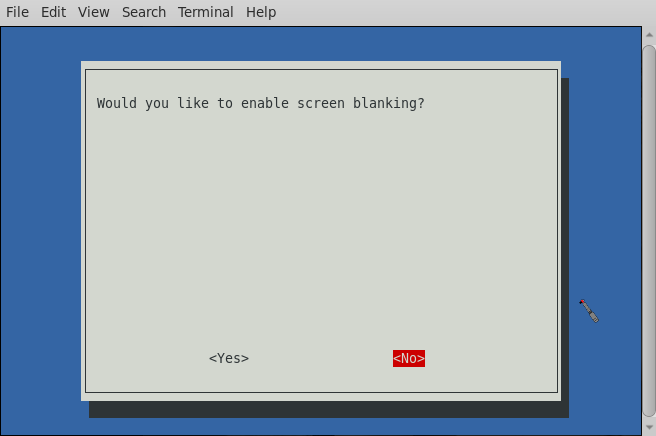
24 Select D4 - Screen Blanking - set to No.
25 Select 4 - Performance Options
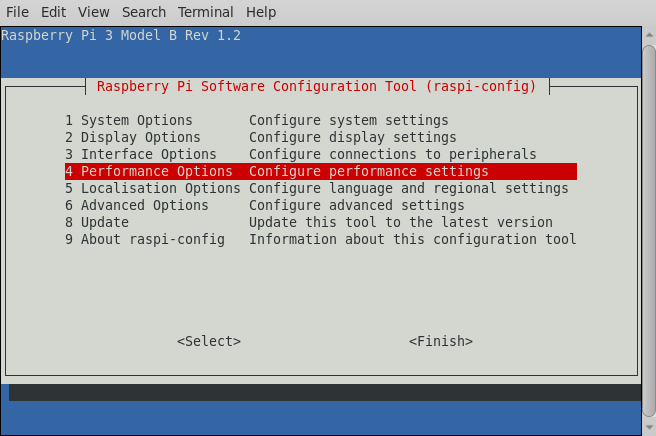
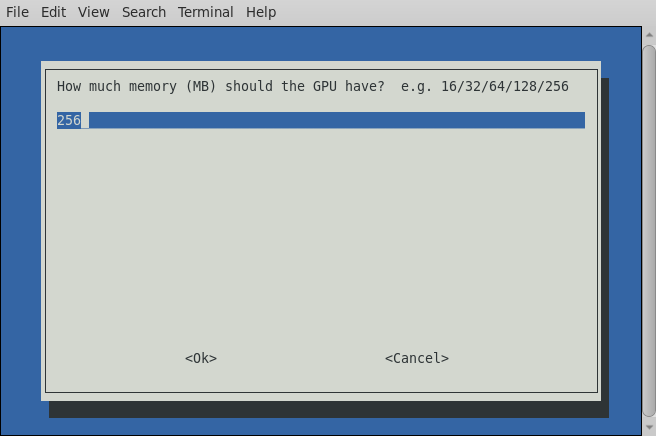
26 Select P2 - GPU Memory
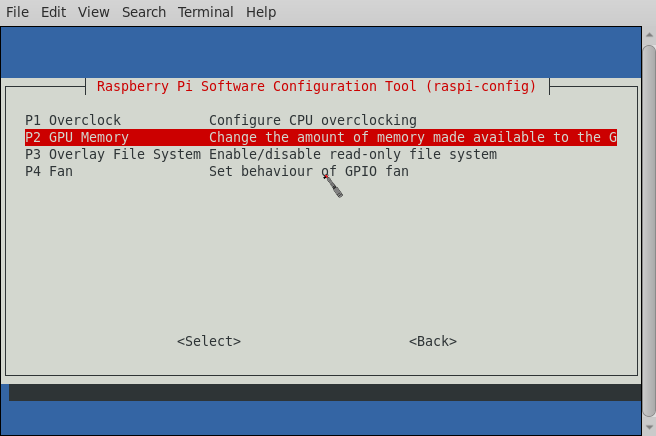
27 Set 256 and tab to OK, then press Enter.
28 Select 6 - Advanced Options
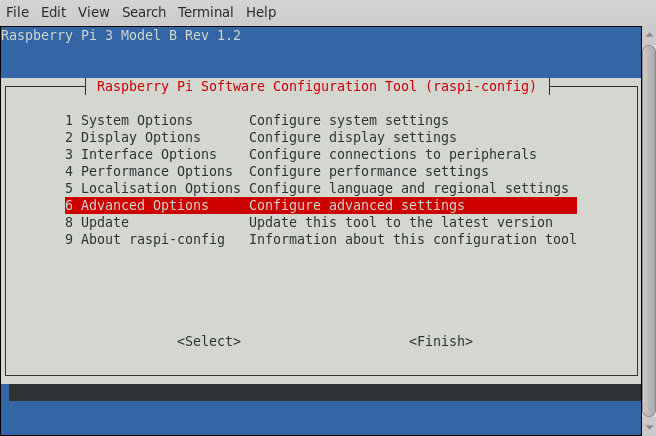
29 Select A2 - GL Driver.
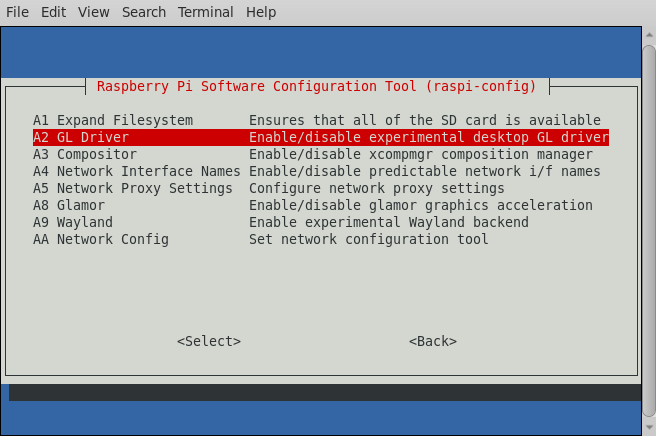
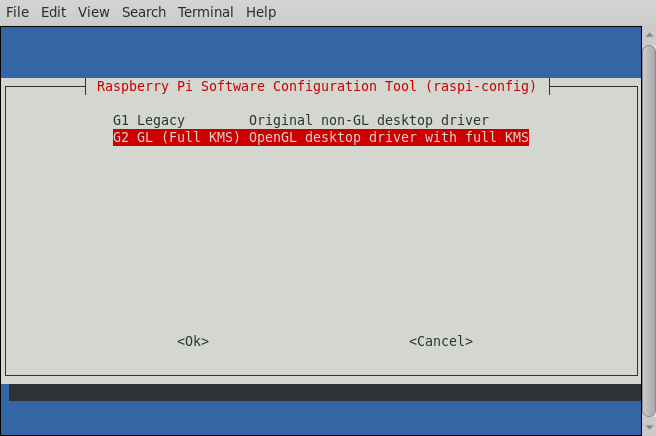
30 Select G2, then tab to OK to select the OpenGL driver.
31 Return to the Advanced Options and select A8 - Glamor
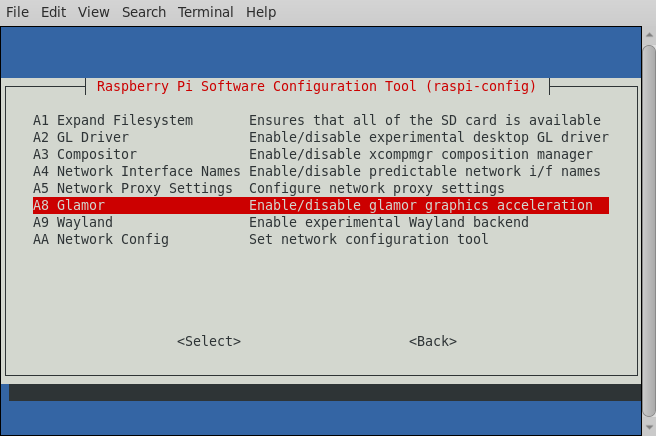
32 Select Yes to enable the Glamor acceleration.

Set your locale and time-zone if needed. The image defaults to the United Kingdom as that is where the Raspberry Pi was invented.
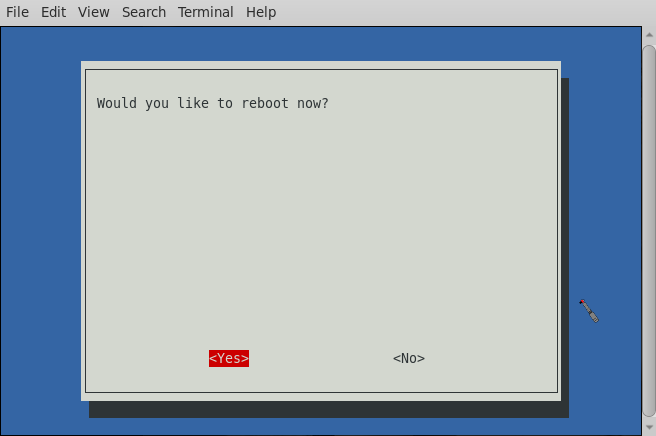
33 Select Finish.
34 And reboot to finalise the changes.
Login via SSH again. You will be in the home directory of the pi user.
35 Create a scripts folder with the command: mkdir scripts
36 Change to the scripts folder with: cd scripts, then create a file called "music-videos" with nano: nano music-videos
And copy into it the following:
| #!/bin/bash # # Script to play Music videos via VLC VIDS=~/Videos PLIST=/tmp/MTV.m3u find $VIDS -name *.mp4 -type f > $PLIST vlc -f -Z --no-video-title-show --no-qt-privacy-ask --vout mmal_xsplitter $PLIST unset VIDS unset PLIST exit 0 |
Save the contents of the file when you are finished.
Update 26th December 2022 the option --vout mmal_splitter is Pi specific. It sends the video to the hardware accelerator to remove the load on the CPU. Your results may vary.
37 Give the file execute permissions with: chmod 755 music-videos
38 Change directory to .config with: cd ~/.config
39 Create an autostart directory with: mkdir autostart
40 Change to the autostart directory with: cd autostart
41 Create a file called music-videos.desktop with nano music-videos.desktop and add the following:
| [Desktop Entry] Type=Application Name=Music Videos Exec=/home/pi/scripts/music-videos Comment=Music Videos via VLC |
Save the contents of the file when you are finished.
The above file will be called when the graphical interface starts. This file will call the music-video script, which will create a playlist and call VLC to play it full screen.
You can now disable some extraneous processes with:
sudo systemctl disable cups
sudo systemctl disable ModemManager
And remove PackageKit as we do not need it, with: sudo apt purge packagekit -y
You are now ready to copy your music video collection to the Videos folder. There are various methods you can use to transfer your files. Rsync and SCP being two you can use, if you have your videos stored on another Linux device.
What if you have started this project fresh and would like to start your collection? Check out my howto on using youtube-dl
Page updated: 22nd January 2023